
Frontend Interview Question - Create a Bubble Sort Visualization
Published:
A cool interview question I was asked for a frontend role recently was:
“Make a bubble sort visualization. Users should be able to step forward and backward in individual steps of the algorithm to see how the algorithm works. They should also have an option to ‘play’ the algorithm from start to end.”
This question was to be solved in Vanilla JavaScript and I thought it was a really fun exercise in JavaScript, CSS, and promises. Let’s jump in.
Bubble Sort Algorithm
First we have to write the actual bubble sort algorithm. The algorithm iterates from left and compare adjacent elements and the higher one is placed at right side. Logically, this means the largest element is moved to the rightmost end at first. You repeat this process until there is no longer a swap.
Additionally, I wanted to maintain 2 other variables: steps and step to see which step of bubble sort we were currently on. steps would store the indices of elements to swap at step step.
This can be written like so:
let array = [6, 4, 7, 8, 10, 1, 0]
const steps = []
let step = 0
const bubbleSort = () => {
  for(let i = 0; i < array.length; i++) {
    let swapped = false // store whether we have swapped or not
    for (let j = 0; j < array.length - i - 1; j++) {
      if (array[j] > array[j + 1]) { // swap adjacent elements if they are out of order
        const temp = array[j]
        array[j] = array[j + 1]
        array[j + 1] = temp
        swapped = true
        steps.push([j, j + 1])
      }
    }
    if (!swapped) { // return if no swap has occurred
      return
    }
  }
}
bubbleSort()
console.log(array) // [0, 1, 4, 6, 7, 8, 10]
Easy enough. Now, let’s initialize the actual visualization.
Visualization
I wanted each number to be in a separate box, spread out along a horizontal line.
So, I put the numbers in a div to ensure they would be rendered along the same line. This div had an id="wrapper".
Additionally, we want to have 2 buttons to either ‘Step’ forward once or ‘Play’ the entire algorithm. I put these inside a separate div and added the class="controls". I wanted these controls to be on the same line and spaced apart using the following class:
.controls {
  display: flex
  button {
    margin: 50px
  }
}
The entire HTML code is fairly simple:
  <body>
    <div id="wrapper"></div>
    <div class="controls">
      <button onclick="handleStep()">Step</button>
      <button onclick="handlePlay()">Play</button>
    </div>
  </body>
Next, I had to render the individual boxes. I did this in a function I called init. This would get the wrapper and append each number to the wrapper.
In order to animate these boxes, I set their position to be absolute and translated it by a variable translateX. I could then get this translate value based on the id I assigned to each div and perform the swaps accordingly.
const init = () => {
  let translate = 0
  for (let i = 0; i < array.length; i++) {
    const div = document.createElement("div")
    div.innerText = array[i]
    div.id = i
    div.classList.add("box")
    div.style = `transform: translate(${translate}px, 0px)`
    translate += 30
    container.appendChild(div)
  }
  bubbleSort()
}
init()
The class definition of box is like so:
.box {
  position: absolute;
  background-color: lightblue;
  border: solid 1 px black;
  display: flex;
  justify-content: center;
  align-items: center;
  height: 20px;
  width: 20px;
}
This simply creates a light blue 20x20 box with a 1px black border containing the number in the center of the box. The key is the position: absolute which allows us to modify the box’s position however we want later.
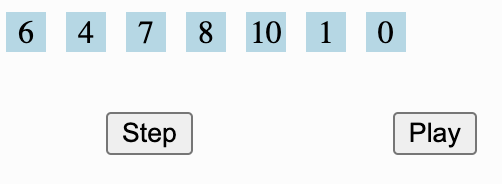
Initial rendering of the array and controls
Handle Step
The bulk of the logic is in handling each successive step, which is triggered on click of the Step button.
To perform this, we need to have some understanding of how we want the Play functionality to work. Keep in mind that we want each successive step to take place after the previous one is complete. We should wait for the completion of the prior step before triggering the next. This smells of Promises.
Promises will allow us to wait for each step to complete and resolve when the step is complete. That way, our play function can be async and move to the next step when the prior step resolves. This allows us to conclude that our step function should return a Promise.
So, our step function will perform the following steps:
- Get the indices of the step we are on
- Get the two HTML elements corresponding to these indices
- Parse the two transforms from the two elements
- Create a variable
deltathat will allow us to increment/decrement the element positions - Swap the two element ids (this is akin to swapping the two elements in the array)
- Increment the
stepvariable to indicate we have performed a step
Next, we have to gradually move each element by delta at a certain interval. We can use setInterval to perform this task. More explicitly, the setInterval function should:
- Transform both elements
- Check if both elements are close enough to their end position
- If so:
- Move both elements to their end positions
- Clear the timeout
- Resolve the promise so we can move to the next step
- If so:
It’ll make more sense with the actual code:
const handleStep = () => {
  return new Promise((resolve, reject) => {
    if (step === steps.length) reject("Complete"); // if we've completed all steps, simply reject
    const [i, j] = steps[step];
    const el1 = document.getElementById(i);
    const el2 = document.getElementById(j);

    // Parse two transforms and store in variables
    let transform1 = parseFloat(
      el1.style.transform.split("(")[1].split("p")[0],
    );
    let transform2 = parseFloat(
      el2.style.transform.split("(")[1].split("p")[0],
    );
    const end1 = transform2;
    const end2 = transform1;

    // We want the interval to step by delta every 30ms
    const delta = (transform2 - transform1) / 30;

    // Swap ids
    const temp = el1.id;
    el1.id = el2.id;
    el2.id = temp;

    const id = setInterval(() => {
      // Increment transforms and restyle boxes
      transform1 += delta;
      transform2 -= delta;
      el1.style = `transform: translate(${transform1}px, 0px);`;
      el2.style = `transform: translate(${transform2}px, 0px);`;

      // Check if close enough to finish and end
      if (Math.abs(transform1 - end1) < 0.01) {
        el1.style = `transform: translate(${end1}px, 0px);`;
        el2.style = `transform: translate(${end2}px, 0px);`;
        clearTimeout(id);
        resolve("Stepped");
      }
    }, 30);
    step++;
  });
};
Handle Play
With the bulk of the logic in handleStep, our work in handlePlay is relatively simple. We simply iterate through the remaining steps and wait for each step to complete using async/await syntax:
const handlePlay = async () => {
for (let i = step; i < steps.length; i++) {
try {
await handleStep();
} catch (e) {
break;
}
}
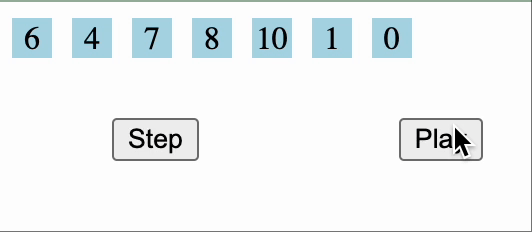
};And that’s it folks! Take a look at the following animation to watch handle play and handle step!
Full completed version
The entire code for this program can be found at this Replit